How cute!! And so easy, all you need is a pack of crush soda, ribbon, some tags if you want, and some delicious valentine sugar cookies. You can get the soda pretty much anywhere, but I got the adorable tags from Bella Me Boutique.
Bloom-a-bility
Dream as if you'll live forever, live as if you'll die today.
Friday, February 14, 2014
Happy Valentines Day: College Style
Now that I am living at college with some awesome roommates, what's more fun than making them all valentines? With the help of Pinterest I came up with this:
Tuesday, October 8, 2013
I am back again!!
So I have been pretty busy since I last posted but here are some things I have made. The first is a chalkboard and baby doll I made and sewed for my little cousin's first birthday.
How cute are her little shoes?! It was so much fun to make this doll, and it mostly just took scraps of fabric to make her, and you can personalize it in so many ways. For the full tutorial click on the link Fabric Doll Tutorial, this blogger is incredible and the tutorial is very easy to follow. And just because I love October so much, here is some cute chalk art I did using chalk markers :) I love Fall!!
Friday, May 10, 2013
Sneak Peek
I know that it has been awhile since I have posted anything, but I have a few projects that I am finishing up. So I have decided that until I am able to get those posts up I should give you guys a peek of what we've been working on. Here it is, a sneak peek, enjoy.
Sunday, February 10, 2013
Chalkboard Art
Hey everyone, it has been a long time since I have posted anything. I will try to be better at posting things in the future. But today I am just going to share some pictures of one of the things I have been doing since I last posted. Can you guess what it is? A chalkboard! I love chalkboards especially when they are in colorful, chunky frames.
Tuesday, February 14, 2012
Home-made Valentines
Happy valentines day! I figured it was about time that I posted something new on my blog. I have things to post, but I just needed some motivation to actually get it done. I first got the idea when my friend was sayin that she wished that we still did valentines in high school, and I thought why not? So I decided to make a couple of valentines for my best friends, and they turned oh so cute! Maybe I will do them again next year!
 |
Tuesday, June 28, 2011
Jewelry Frame
Okay, so we made another jewelry frame. I know that we have already done those before, but I thought that it would make the perfect birthday present for one of my best friends. If you want to see the other jewelry frames that we have made click on the link. Here are the pictures of the one that we just made.
They are not the best pictures, but I think that it turned out beautiful. We didn't make the flower, we had to hurry and buy one since we didn't have time to make our own. This is just the kind of flower that you cut out a bunch of circles and then burn the edges. It was a hair clip so I just clipped it to the wire, so she can use it as a decoration or a hair clip!
Monday, March 7, 2011
Waitng for Spring
okay, it has been a while since I have posted anything, but there are several projects that are waiting to be done once the weather turns warm enough for spray painting. I am sorry it has taken so long, but don't worry, we will have another project posted sometime soon, let's hope it doesn't snow. Anyway, that is what is going on and I hope you will be able to wait a little while longer! Thank you!
Saturday, November 13, 2010
Halloween Lanterns
I know that it is the middle of November, but I haven't been able to post this until now. During October we love to decorate the house, and one of our decorations are made from cans from canned food. Here is what you do.
- You get your can, it doesn't matter what size, but if you want to punch a bigger pattern into it don't use a super small one.
- Before you punch holes into your can fill it with water all the way to the to and freeze it, this makes it so when you punch the pattern into it it does not bang up the can in the process.
- Get a nail and a hammer, and start punching. You can do ghosts, Jack-o-Lanterns, cats or anything that you would like. You should also punch around the top and bottom of the can.
- Get some wire, it can be any kind, just not too flimsy, and wrap it around a pencil to make it curly. you attach the wire to two of the holes around the top of your can so that it makes a handle for hanging.
- Spray paint it, we usually do our orange, but you can do it whatever color.
- Put it on display and stick a candle in it.
This would also be the perfect thing to do for any holiday or occasion. You could make snowflakes for Christmas or anything.
Sunday, October 17, 2010
Boo Blocks
This is a really easy craft project to do, you can do it in very little time and the result is total cuteness. What you will need is:
Once you have that done you may have noticed that the edges on you blocks aren't perfect, that is fine, just grab some sandpaper and ruff it up on the edges so if the paper is out of place, it won't matter. If you got your blocks perfect and you don't want to distress the edges that is fine, just skip this step.
Then we bring out the stencils. You will need a solid color for this one if you want your letters to pop out, I just used some stencils that we had around the house, but you could even get craftier and use some font off of the computer. Unfortunately we are out of ink, so I did it the old fashioned way. Then you modge podge those onto your blocks where you want, play around with it and see how you like it best. You can tilt the letters or just have them all straight. I am sorry I forgot to do before pictures but here are my afters.
- Wooden blocks, you can get these at your local craft store (we got lucky and found ours at the D.I.)
- Modge Podge
- Scrapbook Paper
- Sandpaper
- Stencils
Once you have that done you may have noticed that the edges on you blocks aren't perfect, that is fine, just grab some sandpaper and ruff it up on the edges so if the paper is out of place, it won't matter. If you got your blocks perfect and you don't want to distress the edges that is fine, just skip this step.
Then we bring out the stencils. You will need a solid color for this one if you want your letters to pop out, I just used some stencils that we had around the house, but you could even get craftier and use some font off of the computer. Unfortunately we are out of ink, so I did it the old fashioned way. Then you modge podge those onto your blocks where you want, play around with it and see how you like it best. You can tilt the letters or just have them all straight. I am sorry I forgot to do before pictures but here are my afters.
Saturday, August 21, 2010
Jewelry Frames
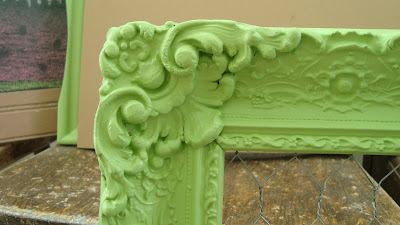
If you liked the post about our chalkboard frames you are going to love this. It is very simple and easy, and you don't need a lot of stuff to do it. Here are the supplies that you need for this project.
We took them to a local farmer's market to try our luck at selling them, hopefully we will! If you want the tutorial on how to make the Flower Tutorial click the link and it will take you to the video that shows you how to make the flowers.
- Picture Frame
- Chicken Wire
- Spray Paint
We took them to a local farmer's market to try our luck at selling them, hopefully we will! If you want the tutorial on how to make the Flower Tutorial click the link and it will take you to the video that shows you how to make the flowers.
Friday, August 13, 2010
Locker Wallpaper
It is Back-to-School, that means shopping for clothes, and supplies for school, but when you go shopping do not forget one of the most important things that most of us need: Locker decoration! We were shopping at Shopko and we were looking down the school supplies row when we saw this package of patterned paper that said "Magnetic Dr-Erase Wallpaper" I could not believe it. It is the perfect thing if you are looking for an easy and cute way to decorate your locker. I have tried it where I had to tape scrapbook paper onto the locker or use magnets to hold it up, and neither is a very good way to do it, so when I saw this I had to buy it and see if it really worked, we also bought some dry-erase markers.
This is the perfect thing to use if you decorate your locker, it sticks to most metal and does not fall off easily! Comes in all kinds of fun patterns, I cannot wait to use this in my locker.
This is the perfect thing to use if you decorate your locker, it sticks to most metal and does not fall off easily! Comes in all kinds of fun patterns, I cannot wait to use this in my locker.
Tuesday, July 13, 2010
Jar of Fabric
Are you the kind of person who has a bunch of scraps from fabric that you just don't know what to do with or where to put it? Or are you looking for a gift for a friend who likes to sew but can't think of what to get them? I was at a local craft store the other day looking for a gift, and we spotted a glass gar with some fat quarters inside, it looked so cute. We had some of those same jars at home so we decided to buy some fat quarters from the shop and go home and make our own, the perfect gift. here is the before of the jar.
the we put the different patterned pieces of fabric and stuffed them inside so that they lined the edges of the jar. Then we tied a ribbon around the top. here is the result.
This is a perfect way to store your left over fabric, and make it cute at the same time!
the we put the different patterned pieces of fabric and stuffed them inside so that they lined the edges of the jar. Then we tied a ribbon around the top. here is the result.
This is a perfect way to store your left over fabric, and make it cute at the same time!
Subscribe to:
Posts (Atom)


